If you ignore proper brightness settings, your 4K projector can look washed out, even in high resolution. Too little brightness in a bright room makes images dull and reduces contrast, while too much can cause glare and color oversaturation. To get vibrant, sharp visuals, you need to match your projector’s brightness to your environment and adjust carefully. Keep in mind that environmental factors and calibration matter—stick around to learn how to optimize your setup for the best picture.
Key Takeaways
- Ignoring proper room ambient light control causes images to appear washed out regardless of projector brightness.
- Failing to calibrate brightness and color settings leads to dull, oversaturated visuals.
- Using a projector with insufficient lumens for the room size results in weak, washed-out images.
- Neglecting lens focus and alignment can reduce perceived brightness and image sharpness.
- Overlooking regular calibration and maintenance diminishes contrast and vibrancy, making images look faded.

ViewSonic LS901-4K 5500 Lumens 4K Laser Projector, High Brightness with HDR Support for Home Theater, 1.7X Optical Zoom, H/V Keystone, and 360-Degree Projection for Flexible Setup
4K Home Theater Laser Projector: UHD (3840x2160p) 4K resolution with a 1.2-2.0 throw ratio and 5,500 ANSI lumens,…
As an affiliate, we earn on qualifying purchases.
As an affiliate, we earn on qualifying purchases.
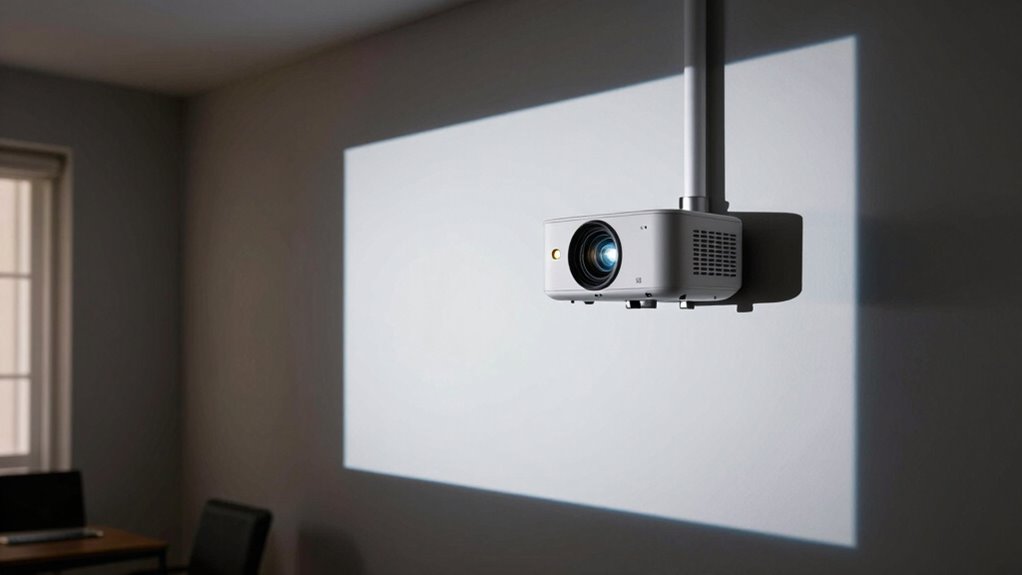
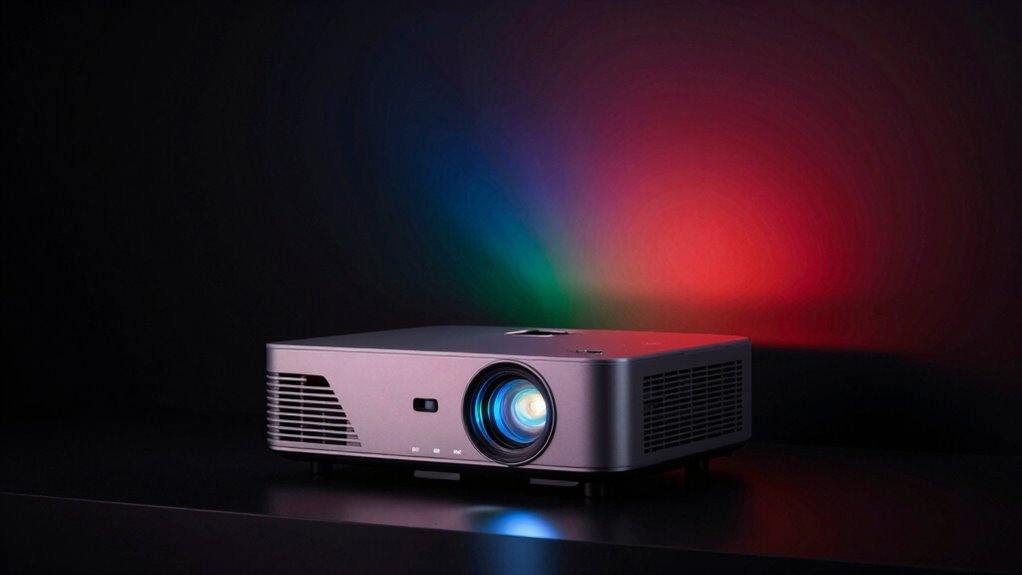
Why Brightness Is Critical for Stunning 4K Projection

Brightness plays a crucial role in delivering stunning 4K projections because it determines how vibrant and clear the images appear, especially in well-lit environments. To maximize brightness, you need proper color calibration, guaranteeing that colors are accurate and lively without appearing washed out. Brightness also depends on precise lens focus; if your lens isn’t focused correctly, images become blurry and dull, reducing perceived brightness. When both color calibration and lens focus are optimized, your projector can produce sharp, vivid visuals with deep contrast and vibrant hues. Additionally, proper focus ensures that every detail in your 4K content pops, even in brighter rooms. This space planning ensures that every detail in your 4K content pops, even in brighter rooms. Ignoring these factors can lead to washed-out images, diminishing the immersive experience you want from your high-resolution projection.
![Outdoor-Projector-4K with WiFi and Bluetooth: [3000 Brightness/50W DoIby/Built-in APPs] Portable-Projector Smart OS 2.0&AI Auto Focus, ONOAYO Movie Proyector Compatible with Netflix/YouTube/PrimeVideo](https://m.media-amazon.com/images/I/41YCwa1cXcL._SL500_.jpg)
Outdoor-Projector-4K with WiFi and Bluetooth: [3000 Brightness/50W DoIby/Built-in APPs] Portable-Projector Smart OS 2.0&AI Auto Focus, ONOAYO Movie Proyector Compatible with Netflix/YouTube/PrimeVideo
[Stream Without Limits – Built-in APPs, Compatible with Netflix] The ONO3Pro 2.0 outdoor projector brings the world’s top…
As an affiliate, we earn on qualifying purchases.
As an affiliate, we earn on qualifying purchases.
How Ambient Light Affects Your Projector’s Brightness
Ambient light can greatly diminish the perceived brightness of your projector, making images appear washed out. You need to take room brightness into account when choosing your projector’s settings to guarantee the image stays vivid. Adjusting these settings accordingly helps maintain a clear, crisp picture regardless of your environment. Understanding digital content formats can further optimize how your projector displays different types of media in varying lighting conditions. Additionally, selecting a projector with appropriate brightness ratings can ensure a better viewing experience in well-lit rooms. Being aware of market trends and digital asset insights can also help you choose the right projector features for your specific needs. Incorporating solar safety principles, such as managing environmental factors, can also contribute to maintaining optimal projector performance in various settings. For example, knowing the net worth of celebrities like Kate from “Breaking Amish” can inspire investment in higher-quality projectors for entertainment spaces.
Impact of Room Brightness
When your room is filled with sunlight or bright artificial lighting, it becomes much harder for your projector to produce a clear, vivid image. High ambient light washes out colors and reduces contrast, making it seem dull and less detailed. Room brightness impacts not just the projector’s image but also how you experience sound; poor room acoustics can amplify noise, distracting from the visuals. Your seating arrangement also matters—sitting too close or in direct line of sight to windows increases exposure to ambient light. To improve image quality, consider controlling room brightness by using blackout curtains or dimming lights. Additionally, understanding your projector’s contrast ratio can help you optimize settings for better performance in different lighting conditions. Being aware of your environment’s environmental impact can guide you towards more sustainable choices like using energy-efficient lighting or eco-friendly window treatments. For optimal viewing, it’s also helpful to position your projector at the correct projection angle, which can minimize light glare and enhance image clarity. Creating a balanced environment guarantees your projector’s brightness isn’t overwhelmed, and using ambient light control techniques can significantly improve the overall picture quality, ensuring sharper images and a better overall viewing experience. Incorporating indoor environmental factors like dust levels and humidity can further influence image clarity and sound quality, making it essential to maintain a healthy indoor air environment.
Adjusting Projector Settings
Adjusting your projector’s settings is crucial to compensate for varying levels of ambient light in your environment. Properly tweaking settings helps prevent washed-out images and guarantees vibrant visuals. Focus on color calibration to match your room’s lighting, making colors pop without oversaturation. Adjust lens focus for sharp clarity, especially if ambient light causes glare or blurriness. Consider increasing brightness settings for brighter rooms but avoid overdoing it, which can cause loss of contrast. Fine-tune the projector’s contrast and gamma to maintain depth and detail. Use the projector’s menu to access these options easily. Remember, small adjustments can markedly improve picture quality, especially in well-lit spaces. Regularly calibrate and focus your projector to enjoy ideal brightness and color fidelity.

ViewSonic LS740HD 5500 Lumens 1080p Laser Projector, High Brightness for Auditoriums, 1.3x Optical Zoom, H/V Keystone, and 360-Degree Projection for Flexible Setup, HDR Support, and HDMI Inputs
High Brightness FHD Laser Projector: Full HD (1920x1080p) resolution with a 1.1-1.5 throw ratio and 5,500 ANSI lumens…
As an affiliate, we earn on qualifying purchases.
As an affiliate, we earn on qualifying purchases.
How to Measure and Set Brightness Correctly
To measure and set your projector’s brightness accurately, start by using a reliable light meter or a calibration tool designed for display calibration. Begin with a proper color calibration to ensure colors are true to life, which can influence perceived brightness. Next, focus on lens adjustment, making sure the lens is clean and properly aligned to avoid uneven light distribution. Use the calibration tool to measure the projector’s luminance, aiming for a consistent brightness level across the screen. Adjust settings gradually, checking the readings frequently. Properly calibrated color and lens alignment help achieve an accurate brightness setting, preventing washed-out images. Additionally, aligning with your life purpose and goals can enhance your overall viewing experience by fostering a positive mindset towards optimal performance. Regularly monitor your display to maintain consistent brightness levels over time. Incorporate brightness calibration techniques regularly to ensure your projector continues to perform at its best without sacrificing image quality. Remember that proper maintenance of your projector, including cleaning filters and checking for dust, also plays a crucial role in achieving optimal brightness and image clarity. Always verify your adjustments with test patterns or calibrated screens to confirm your projector displays ideal brightness without sacrificing image quality.
Outdoor-Projector-4K with WiFi and Bluetooth: [3000 Brightness/50W DoIby/Built-in APPs] Portable-Projector Smart OS 2.0&AI Auto Focus, ONOAYO Movie Proyector Compatible with Netflix/YouTube/PrimeVideo
[Stream Without Limits – Built-in APPs, Compatible with Netflix] The ONO3Pro 2.0 outdoor projector brings the world’s top…
As an affiliate, we earn on qualifying purchases.
As an affiliate, we earn on qualifying purchases.
Recommended Brightness Levels for Different Room Conditions
Your room size and ambient light substantially influence the ideal projector brightness. Larger rooms or those with more light require higher brightness levels to keep images clear and vibrant. Adjusting brightness based on these factors ensures the best viewing experience in any environment. Considering future technological developments, such as AI-powered adjustments, can further optimize your viewing conditions. Additionally, understanding brightness calibration helps fine-tune your projector for optimal performance. Ensuring your projector supports adaptive brightness technology can also help dynamically adjust settings for varying room conditions. Being aware of ambient light measurement techniques allows you to more precisely match your projector’s brightness to your specific space, especially when integrating indoor air quality considerations that may influence ambient light levels through humidity and particulate matter.
Optimal Brightness by Room Size
Choosing the right projector brightness depends heavily on the size of your room. For small rooms, a brightness of 1,000–2,000 lumens works well, guaranteeing vibrant images without washing out colors. Medium-sized rooms benefit from 2,000–3,000 lumens, giving you enough power for clear images and proper color calibration. Large rooms need 3,000+ lumens to maintain brightness, especially if ambient light isn’t fully controlled. Keep in mind that adjusting lens focus helps sharpen images, and proper brightness prevents washed-out visuals. To optimize your setup, consider these tips:
- Match brightness to room size for better color calibration
- Use a higher lumen count for larger spaces
- Make certain lens focus is precise for sharp visuals
- Avoid over-brightening, which can wash out colors
- Adjust brightness based on the number of viewers and screen size
- Remember that ambient light conditions significantly influence how bright your projector needs to be for optimal viewing experience
- Additionally, understanding projector lumen ratings can help you choose the most suitable brightness level for your specific environment.
- Properly evaluating these factors can help prevent visual degradation and ensure a high-quality viewing experience.
- Recognizing the importance of environmental factors allows for more accurate calibration and improved overall image quality.
Adjusting for Ambient Light
Ambient light considerably impacts how bright your projector needs to be for a clear and vivid image. In brighter rooms, you’ll need a higher brightness level, especially if your screen resolution is high, to prevent washed-out visuals. Adjusting for ambient light involves more than just brightness; proper color calibration ensures colors stay vibrant despite lighting conditions. If your room has lots of natural light, consider a projector with higher lumens to maintain contrast and clarity. Conversely, in darker environments, you can dial down brightness without sacrificing image quality. Always test different levels to find the sweet spot, and guarantee your screen surface is optimized to reflect light effectively. Proper adjustments will make your 4K projector deliver sharp images, rich colors, and ideal contrast regardless of ambient lighting.
Common Causes of a Washed-Out Image and How to Fix Them
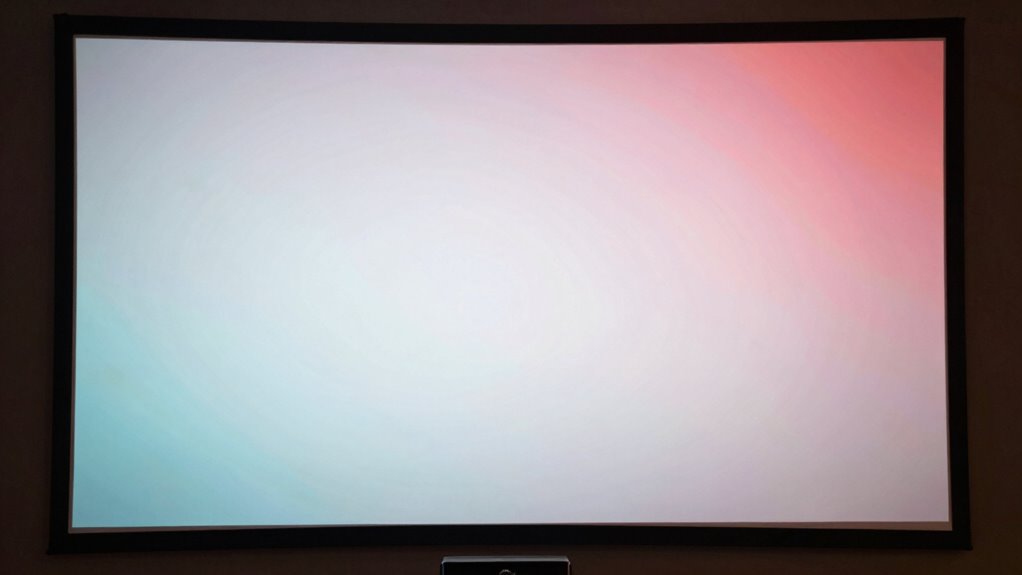
A washed-out image on a projector often results from specific issues that diminish contrast and color accuracy. Common causes include poor color calibration, which skews color balance and dulls visuals, and improper sound synchronization, which can distract from image quality. Other factors are high ambient light, outdated or incorrect projector settings, and lack of proper screen calibration. To fix these issues, start by adjusting your color calibration to restore accurate hues. Guarantee sound synchronization is smooth so audio doesn’t interfere with visual perception. Reducing ambient light and updating projector firmware can also improve contrast. Additionally, check your projector’s settings for contrast and brightness, and consider recalibrating your screen for ideal image clarity. Proper maintenance and calibration make a significant difference in avoiding washed-out images.
Tips to Adjust Brightness for Better Contrast and Colors
After addressing issues like color calibration and sound synchronization, fine-tuning your projector’s brightness settings can make a noticeable difference in image quality. Adjusting brightness carefully enhances contrast and enriches colors, making scenes pop without washing out. To achieve the best, start with a lower brightness and gradually increase until blacks appear deep but not crushed. Keep in mind that overly high brightness can shorten your lamp’s lifespan, so find a balance.
| Brightness Level | Effect | Recommended for |
|---|---|---|
| Low | Deep blacks, less glare | Dark rooms, movies |
| Medium | Balanced contrast & color | Daytime viewing |
| High | Bright, vibrant images | Well-lit rooms |
| Very High | Maximum brightness, risk of lamp wear | Bright environments |
| Best | Best contrast and color balance | Everyday use |
How Screen Material Impacts Brightness and Image Quality

Your choice of screen material directly affects brightness and image clarity. Reflective surfaces boost brightness but can cause glare, while matte screens reduce glare but may soften the image. Keep in mind that some materials lose brightness over time, impacting sharpness and overall picture quality.
Reflective vs. Matte Surfaces
When choosing a screen material for your 4K projector, understanding how reflective and matte surfaces affect brightness and image quality is essential. Reflective surfaces bounce more light back to you, making images brighter, especially in well-lit rooms. Matte finishes scatter light, reducing glare and preventing hotspots, which is ideal for ambient lighting conditions. However, matte screens can slightly dull the image compared to reflective surfaces. Your choice impacts contrast, color vibrancy, and overall clarity. Consider these factors:
- Reflective surfaces boost brightness but can create glare.
- Matte finishes minimize reflections and glare.
- Reflective screens are better for dark rooms.
- Matte screens perform well in bright, ambient environments.
- Light scattering in matte surfaces can slightly reduce contrast.
Choosing the right surface depends on your room’s lighting and viewing preferences.
Screen Material Brightness Loss
Screen material impacts brightness and image quality by affecting how much light reaches your eyes. Over time, some materials can cause brightness loss due to fading or deterioration, reducing overall image clarity. Screen durability is essential because less durable materials tend to degrade faster, leading to uneven brightness and color shifts. Material longevity plays a key role, as high-quality screens maintain their brightness and vividness longer, ensuring consistent performance. Cheaper or lower-quality materials may initially look good but can quickly fade or become less reflective, diminishing brightness and image impact. Choosing a screen with durable, long-lasting material helps preserve brightness over years of use, so your 4K projector can deliver a sharp, vibrant image without looking washed out.
Impact on Image Sharpness
The choice of screen material directly influences how sharp and detailed your projected image appears. A high-quality screen minimizes light diffusion, improving resolution enhancement and maintaining color accuracy. This results in crisper images with clearer edges and finer detail. Conversely, lower-quality screens can cause blurring and reduce overall sharpness. Consider these factors:
- Reflectivity that preserves resolution
- Surface texture for precise color reproduction
- Material clarity supporting resolution enhancement
- Brightness retention for sharper contrast
- Compatibility with projector lumens to avoid dullness
Choosing the right screen material guarantees your 4K projector delivers maximum image sharpness, vibrant colors, and true-to-life detail. It’s essential for maintaining the clarity needed to fully appreciate high-resolution content and avoid washed-out or fuzzy visuals.
Using Calibration Tools to Optimize Your Projector’s Brightness
Using calibration tools is essential for accurately setting your projector’s brightness, guaranteeing you get the best picture quality without overworking the device. By performing color calibration, you can fine-tune the brightness levels to match your environment, preventing washed-out images. Proper calibration also helps maintain your lamp’s lifespan by avoiding unnecessary strain caused by excessive brightness settings. Many projectors come with built-in calibration features or you can use external tools for more precise adjustments. Regular calibration ensures consistent image quality and prolongs your projector’s longevity. Take the time to calibrate your projector correctly, especially in bright rooms, to optimize brightness without sacrificing color accuracy or risking damage to the lamp.
When to Upgrade Your Projector for Better Brightness

Even after calibrating your projector, there comes a point when its brightness no longer meets your needs. If images look washed out or details are lost, it’s time to evaluate an upgrade. You might need a brighter model if your room has high ambient light or large screen size. Proper projector placement can also improve perceived brightness, but when these adjustments no longer suffice, upgrading is the best option. Look for a projector with higher lumens for better brightness. Keep in mind that color calibration can only do so much if the hardware can’t deliver enough light.
Consider upgrading if:
- Your current projector struggles in ambient light
- Images appear washed out despite calibration
- You’ve optimized projector placement but still lack brightness
- You want sharper, more vibrant images
- Your screen size has increased considerably
Final Tips to Maintain Brightness and Image Quality Over Time
To keep your projector performing at its best over time, regular maintenance and careful handling are essential. Proper lighting design around your setup can prevent glare and reflections that diminish brightness and image clarity. Clean your projector’s air filters and lenses regularly to maintain maximum light output. Also, guarantee content resolution remains high; consistently using high-quality sources prevents image degradation. Adjust your projector’s settings to match room lighting conditions and avoid overusing auto-brightness features, which can reduce overall luminance. Store your projector in a cool, dust-free environment when not in use. By paying attention to these details, you’ll sustain brightness and image quality, securing your 4K projector continues to deliver sharp, vibrant visuals over time.
Frequently Asked Questions
How Does Projector Placement Affect Perceived Brightness?
Your projector placement greatly affects perceived brightness. If you position it where ambient light hits the screen, the image looks washed out. Keep the projector at the right angle to minimize light spill and glare. Adjusting the projector angle guarantees that light is focused directly onto the screen, enhancing brightness perception. Avoid placing the projector in bright spots or facing windows, as ambient light diminishes image clarity and vibrancy.
Can Screen Size Influence Brightness Perception?
Yes, screen size influences brightness perception because larger screens require more brightness to maintain vibrant images. When you increase the screen size, ambient lighting can wash out the image if your projector’s brightness isn’t adequate. Viewer distance also matters; sitting farther away makes the image seem dimmer. To avoid washed-out images, make sure your projector’s brightness matches your screen size and ambient lighting conditions, and position yourself at an ideal distance.
What Is the Ideal Brightness for Outdoor Projection?
Like the moon’s glow in the night sky, the ideal outdoor projector brightness depends on ambient light. Aim for at least 2,500 to 3,000 lumens to combat daylight and maintain color accuracy. If you ignore this, your image will appear washed out, losing detail and vibrancy. You want your projection to shine brightly enough to stand out without sacrificing clarity or color, ensuring your audience stays captivated.
How Do Different Projector Technologies Impact Brightness?
Different projector technologies impact brightness by affecting color accuracy and contrast ratio. DLP projectors often deliver brighter images with sharper contrast, making colors pop vividly. LCD projectors provide better color accuracy but may have lower contrast, leading to a washed-out appearance if brightness isn’t sufficient. LCoS projectors combine strengths, offering high brightness, excellent color fidelity, and deep contrast, ensuring your image remains vibrant and sharp regardless of ambient light.
Does Room Color Affect Projected Image Brightness?
Yes, room color affects your projected image brightness. Darker walls and ceilings absorb less light, making images appear brighter and more vibrant, especially in ambient lighting conditions. Light-colored walls reflect more light, causing washed-out images. To improve brightness, consider adjusting your projector’s color calibration and controlling ambient lighting. Using darker room colors and dimming lights can considerably enhance your viewing experience, ensuring your images stay sharp and vivid.
Conclusion
To keep your 4K projector shining its brightest, don’t overlook the importance of proper brightness management. A little attention to ambient light and calibration can make a world of difference, helping you avoid dull, washed-out images. Think of it as fine-tuning your viewing experience—sometimes, a small adjustment can reveal vibrant details you didn’t know were there. Stay mindful of your setup, and your home theater will always look its best, inviting you to enjoy every memorable moment.