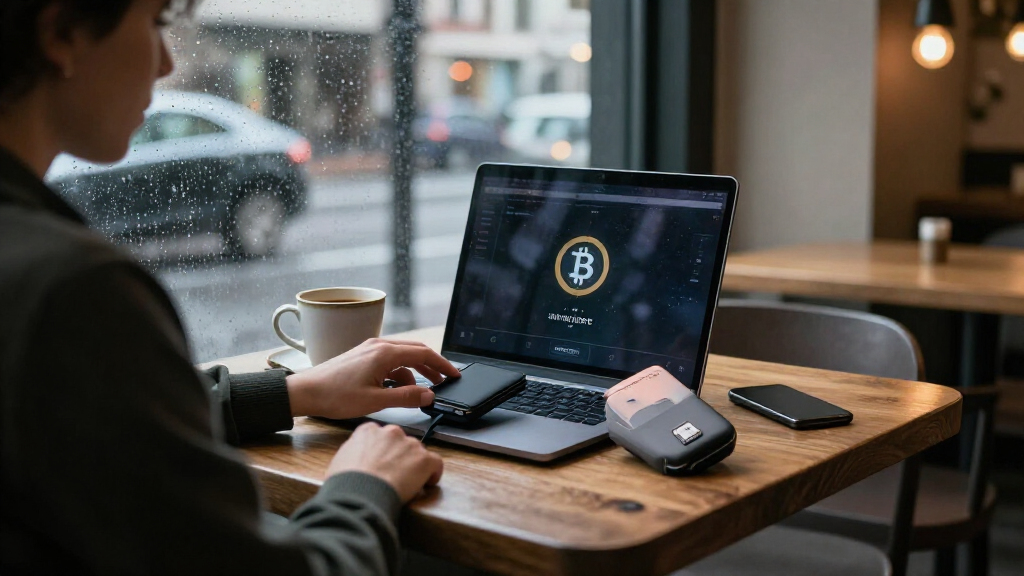

Set up a Bitcoin hardware wallet and verify it by receiving a small test payment. This guide is for beginners who can follow device prompts and use a computer or phone. You will create a wallet, record its recovery phrase offline, check a receiving address, and learn how to protect the funds. Allow 30-60 minutes for setup; the test transaction may take longer to confirm.

Get hardware and tech essentials delivered free with Prime
- Fast, free delivery on millions of items
- Prime Video, Amazon Music and more included
- Member-only deals all year

Trezor Safe 3 Crypto Hardware Wallet, Cosmic Black
- ✔ Security: EAL6+ Secure Element
- ✔ Display: OLED
- ✔ Connection: USB-C

Tangem Crypto Wallet, Pack of 2
- ✔ Security Chip: EAL6+
- ✔ Connection: NFC
- ✔ Included: 2 wallet cards

BitBox02 Nova Bitcoin Hardware Wallet, Midnight Black
- ✔ Security: EAL6+ secure chip and open-source firmware
- ✔ Display: Tempered glass
- ✔ Controls: Touch sensors
Difficulty: Beginner | Time: 30-60 minutes, plus time for a Bitcoin transaction to confirm
What You’ll Need
Tools & Materials:
- A Bitcoin hardware wallet from its manufacturer’s official store or an authorized reseller
- A computer or phone that meets the wallet’s requirements
- The manufacturer’s official companion app, downloaded from its official website or verified app store listing
- Paper and a pen, or the wallet maker’s supplied recovery phrase cards
- A small amount of Bitcoin for a test payment, held at an exchange or another wallet
Knowledge:
- Basic ability to install an app and follow on-screen instructions
- Understanding that anyone who obtains the recovery phrase can control the wallet’s funds
- A Bitcoin wallet or exchange account from which you can send a small test payment
Use a new device with intact packaging and follow the maker’s instructions for checking authenticity. Never type your recovery phrase into a website, computer, phone, chat, or support form. The companion app should not need the phrase to connect to the hardware wallet.
Trezor Safe 3 Crypto Hardware Wallet, Cosmic Black
The Trezor Safe 3 is the most balanced Bitcoin pick in this group. Its OLED lets us confirm transaction details on the wallet itself, adding a separate check before approval. PIN and passphrase support give buyers additional account protection, while the multi-share backup offers a recovery approach that differs from Tangem’s extra wallet cards and BitBox02’s microSD option.That balance earns it the top position: it pairs a screen-based confirmation routine with recovery flexibility without restricting the wallet to Bitcoin alone. For buyers who may also hold other supported assets, Trezor Suite offers access to thousands of coins and tokens. This breadth is useful if Bitcoin is central to a wider portfolio, though it matters less to someone who wants a dedicated Bitcoin-only device like the BitBox02 Nova.Setup and ongoing use require compatible Trezor Suite software, so the Safe 3 is not as phone-first and cable-free as Tangem. Its USB-C connection and small OLED make it a conventional hardware-wallet experience: connect, review, and confirm. The listed limitation is also practical: it is not water resistant. We would choose it for its mix of transaction visibility and backup choices, but buyers should be comfortable setting it up with the software and keeping recovery materials secure.
Pros:
- OLED screen supports on-device transaction confirmations.
- PIN and passphrase support add account protection options.
- Multi-share backup gives a recovery choice beyond a single backup card.
- Supports thousands of coins and tokens through Trezor Suite.
Cons:
- Requires setup and use with compatible Trezor Suite software.
- Not water resistant.
Best for: Bitcoin holders who want a screen for on-device confirmation, PIN and passphrase support, and recovery flexibility in a wallet that also supports other assets.
Not ideal for: Buyers who want phone-only NFC access, water resistance, or a dedicated Bitcoin-only wallet.
Bottom line: We recommend the Trezor Safe 3 for buyers seeking the clearest balance of Bitcoin transaction checks, recovery flexibility, and broader asset support.
“We recommend the Trezor Safe 3 for buyers seeking the clearest balance of Bitcoin transaction checks, recovery flexibility, and broader asset support.”
Tangem Crypto Wallet, Pack of 2
Tangem’s two-card wallet is the most different form factor here. Rather than connecting a small device by cable and reading a screen, we access it with a compatible phone over NFC. Its EAL6+ chip generates and protects private keys, and setup does not require displaying a seed phrase. For buyers who prefer a card they can tap to a phone, that streamlined routine may feel more approachable than using Trezor Suite or BitBox02’s computer and mobile connections.The pack includes two cards, which gives owners a built-in spare, but those cards still need careful handling. Tangem’s recovery model differs from the Trezor Safe 3’s multi-share backup: the backup cards must be stored securely in separate places so one misplaced or damaged card does not leave both together. Unlike the Trezor and BitBox02, Tangem has no listed display for reviewing transaction details directly on the wallet. Buyers should be comfortable relying on the phone-based workflow.Its durability claims are a strong practical distinction: the cards are described as waterproof and shockproof, with IP69K protection and a stated operating range from −25°C to 50°C. That makes Tangem more suited to rougher carry than the Safe 3, which is not water resistant. The tradeoff is dependence on a compatible NFC phone; it has no cable, Bluetooth, or battery-based access alternative. Wide support for blockchains and tokens makes it flexible, but Bitcoin-only users may not need that breadth. Choose Tangem when card convenience and resilience matter more than an integrated screen or computer-based routine.
Pros:
- EAL6+ chip generates and protects private keys on the device.
- Two cards provide a spare and avoid seed phrase display during setup.
- NFC access works without cables, Bluetooth, or batteries.
- Cards are described as waterproof, shockproof, and IP69K rated.
Cons:
- Requires a compatible phone for NFC access.
- Backup cards need secure storage in separate locations.
- No wallet display is listed for on-device transaction review.
Best for: Bitcoin holders who prefer tapping durable wallet cards to a compatible phone and want a spare card without managing seed words during setup.
Not ideal for: Buyers without a compatible NFC phone, or anyone who wants a wallet display for directly checking transaction details.
Bottom line: We would choose Tangem for phone-first access and durable cards, provided NFC dependence and card-based recovery suit our routine.
“We would choose Tangem for phone-first access and durable cards, provided NFC dependence and card-based recovery suit our routine.”
BitBox02 Nova Bitcoin Hardware Wallet, Midnight Black
The BitBox02 Nova Bitcoin is the specialist in this roundup. Its Bitcoin-only edition is deliberately narrower than the Trezor Safe 3 and Tangem, both of which support many other crypto assets. That can suit buyers who want a wallet centered on Bitcoin and do not need to manage a mixed portfolio. The tradeoff is absolute: this edition does not support other cryptocurrencies.For a Bitcoin holder who values transparency and backup choice, the Nova brings together an EAL6+ secure chip and open-source firmware. It supports a microSD backup and optional BIP-39 recovery words, offering two approaches where Tangem relies on spare cards and Trezor offers multi-share backup. A tempered glass display and touch sensors provide a screen-based interaction, unlike Tangem’s phone-tap design. The listed description does not spell out the same OLED confirmation details as the Safe 3, so buyers comparing transaction review should check the device’s software and setup guidance.Connectivity is broad: USB-C, supplied adapters for USB-A and Lightning, and optional encrypted Bluetooth Low Energy. It works across desktop and mobile systems, including iPhone and iPad. Bluetooth is optional and may be disabled, which gives buyers control over whether to use that connection. These options make the Nova adaptable, but the assortment of adapters and backup choices may be more than someone seeking a simple card-and-phone workflow wants. We place it behind Trezor because of its narrower asset support and behind Tangem for quick phone-first access; for Bitcoin-only buyers, its open-source firmware and flexible backups are the main draw.
Pros:
- Bitcoin-only edition pairs an EAL6+ secure chip with open-source firmware.
- Backup options include microSD and optional BIP-39 recovery words.
- Tempered glass display and touch controls avoid conventional buttons.
- Works with desktop and mobile systems, with optional encrypted Bluetooth.
Cons:
- Bitcoin-only edition does not support other cryptocurrencies.
- Bluetooth is optional and may be disabled.
- Multiple connection and backup options may add setup decisions.
Best for: Bitcoin-focused holders who value open-source firmware, a display, and a choice between microSD backup and BIP-39 recovery words.
Not ideal for: People who plan to hold other cryptocurrencies or want the simplest NFC card workflow.
Bottom line: We recommend the BitBox02 Nova to Bitcoin-only buyers who prioritize open-source firmware and flexible recovery over broad asset support.
“We recommend the BitBox02 Nova to Bitcoin-only buyers who prioritize open-source firmware and flexible recovery over broad asset support.”
As an Amazon Associate we earn from qualifying purchases.
Before You Start
Choose a private, calm place where no camera or bystander can see the recovery phrase. A hardware wallet protects the signing keys, but it cannot protect a phrase that you expose or store online. Confirm that the receiving and sending services support Bitcoin on the Bitcoin network; selecting another network can result in lost funds. Bitcoin transactions are generally irreversible.
Do not follow setup instructions from unsolicited messages or search ads. Navigate to the manufacturer’s official website yourself, and use its instructions for your exact model.
Step-by-Step Instructions
Step 1: Check the device and download its app
Inspect the package and device for signs of prior use, such as a wallet that is already initialized, a supplied recovery phrase, or a PIN that has been set for you. Do not use a device with an unexplained prewritten phrase; contact the manufacturer through its official support channel. Download the official companion app from the maker’s website or a verified app store listing, then connect the wallet as its instructions specify.
Tip: A legitimate setup starts with creating a new wallet or restoring one you already own. No seller or support agent should provide a phrase for you to use.
Check: The app recognizes the device, and the wallet is not already initialized with a phrase or PIN you did not create.
Step 2: Create a new wallet and set a PIN
Select the option to create a new wallet on the hardware device itself. Follow the prompts to set a PIN that you can remember but that others cannot easily guess. Enter and confirm the PIN using the device’s controls. Keep the PIN private; do not reuse an easily guessed code such as 0000 or a birth date.
Tip: The device may limit incorrect PIN attempts and reset itself after too many. Read the model’s instructions before entering codes if you are unsure how its keypad works.
Check: The device accepts your PIN and proceeds to create a wallet or display the recovery phrase.
Step 3: Write down and check the recovery phrase
Copy every word in the recovery phrase displayed by the device, in the displayed order, onto the supplied card or paper. Use the device to review the words or confirm them when prompted. Check spelling and sequence carefully. Store the written backup somewhere private and protected from fire, water, theft, and unauthorized access. Do not photograph it, save it in a password manager or cloud account, or enter it in the companion app.
Tip: Anyone who gets this phrase can restore the wallet and take its Bitcoin, even without the hardware device. Keep it away from the wallet if that reduces the chance that one theft exposes both.
Check: The device confirms the recovery phrase check, and you have a legible offline backup in the correct order.
Step 4: Finish setup and open the Bitcoin account
Complete any remaining device prompts, then use the official app to install or open its Bitcoin account feature if required. Confirm the app is connected to the hardware wallet. If the app offers an optional passphrase or hidden wallet feature, leave it disabled unless you understand that it can create a separate wallet and that forgetting the passphrase can make those funds inaccessible.
Tip: An app may show balances and addresses, but the hardware device should approve transactions. Keep the device firmware and app current using the manufacturer’s official instructions.
Check: The app shows the Bitcoin account associated with your device and offers a way to display a receiving address.
Step 5: Display and verify a receiving address
Select Receive in the app and ask the hardware wallet to display or confirm the address. Compare the full address on the device screen with the address shown in the app. Use the device-confirmed address when requesting a payment. If even one character differs, stop and do not send funds; close the app and reconnect using the manufacturer’s instructions.
Tip: Malicious software can replace a copied address. Verify it on the hardware wallet screen each time you receive, especially before a large payment.
Check: The address on the wallet’s trusted screen matches the address you plan to share.
Step 6: Send a small test payment
Start a withdrawal from your exchange or other Bitcoin wallet to the verified address. Select the Bitcoin network and send only a small amount you can afford to risk while learning. Review the address, network, amount, and fee on the sending service before confirming. Wait for the transaction to appear in the wallet app; confirmation time depends on network traffic and the fee selected.
Tip: Some services impose minimum withdrawals or charge fixed fees. Check the total before submitting, and do not use a different network to get around a minimum.
Check: The transaction appears in the wallet app at the expected address and amount. For stronger confirmation, wait until the transaction has at least one blockchain confirmation.
Step 7: Practice a small send and secure the setup
Start with a small test amount if you need to send Bitcoin. Enter the recipient address, choose the Bitcoin network, and review the destination and amount on the hardware wallet’s own screen before approving. After the test arrives, store the wallet and recovery backup securely, and record where you placed the backup without writing its words in the same note.
Tip: Never approve a transaction whose address or amount on the device differs from what you intended. You can disconnect the device after use; your wallet remains on the Bitcoin network.
Check: You know how to verify a send on the device, the test payment arrived at its destination, and the recovery backup is stored offline.
Common Mistakes to Avoid
- Entering the recovery phrase into a computer, phone, website, or support chat. — Enter a phrase only on the hardware wallet when restoring a wallet. Treat any request to type it elsewhere as a theft attempt.
- Skipping the device screen check for a receiving or sending address. — Compare the full address on the hardware wallet screen before sharing it or approving a transaction.
- Choosing a different network or sending the full balance before testing. — Select Bitcoin on the Bitcoin network and test with a small amount before transferring more.
- Keeping the only recovery copy in a photo, cloud drive, or easily found place. — Keep a legible offline copy in a private, protected location and consider a second secure offline copy if loss or damage is a concern.
Troubleshooting
Problem: The companion app does not detect the wallet.
Solution: Check the connection, cable, battery, and device unlock state. Confirm that you installed the official app for your model, then follow the maker’s connection and firmware guidance.
Problem: The app and hardware wallet show different receiving addresses.
Solution: Do not use the address or send funds. Disconnect, verify the app source, reconnect the device, and generate a fresh address. Contact official support if the mismatch continues; never give support your recovery phrase.
Problem: The test payment has not appeared.
Solution: Check the sending service’s withdrawal status and transaction ID. Look up that ID in a reputable Bitcoin block explorer or the wallet app. Pending transactions can take time; confirm that the correct address and Bitcoin network were used.
Problem: You cannot remember the PIN or the device resets after wrong attempts.
Solution: Stop guessing. Use the manufacturer’s official recovery instructions and restore only with your own recovery phrase on the hardware device. If the phrase is missing, do not reset the wallet because that may remove access to its keys.
What Success Looks Like
The wallet was initialized by you, its PIN works, and its recovery phrase is recorded offline and checked. The official app can display a Bitcoin receiving address that matches the device screen. A small test payment appears at that address, and you understand how to verify the recipient and amount on the device before approving a send.
Next Steps
Keep the recovery backup private and check occasionally that it remains legible and accessible. When receiving future payments, verify the address on the hardware wallet; for a large transfer, consider repeating a small test first. Update the wallet and app through official channels. If the device is lost or damaged, restore the wallet on a trusted compatible device using the offline phrase, and move funds to a new wallet if you suspect the phrase was exposed.
Frequently Asked Questions
Does a hardware wallet store Bitcoin?
No. Bitcoin remains recorded on the blockchain. The device protects the keys used to authorize transactions and helps you approve them.
Can I recover my Bitcoin if the hardware wallet breaks?
Usually, you can restore access with the recovery phrase on a compatible trusted wallet. The phrase is the backup, so anyone who obtains it can control the funds. Never enter it into a computer or website to recover.
Should I keep the hardware wallet connected to my computer?
No. Connect it when you need to check or approve an action, then disconnect it. Your Bitcoin remains on the blockchain while the device is offline.
How much Bitcoin should I use for the test?
Use the smallest amount allowed by the sending service that is still worth the fee. Check the withdrawal minimum and fee before submitting; avoid risking an amount that would cause hardship if sent incorrectly.
Is a hardware wallet safe if I lose the recovery phrase?
The device may still work, but a lost phrase can leave you unable to recover if the device is lost, damaged, or reset. If the phrase is gone, create a new wallet with a new backup and transfer funds while the old device still works.